1. Accessing the WhatsApp Builder
To start building, navigate to your campaign and find the WhatsApp automation card. Click the Edit Icon on the workflow button to open the visual workflow canvas.2. Configuring Initial WhatsApp Messages
Click the Edit Icon on the first WhatsApp node to open the configuration sidebar.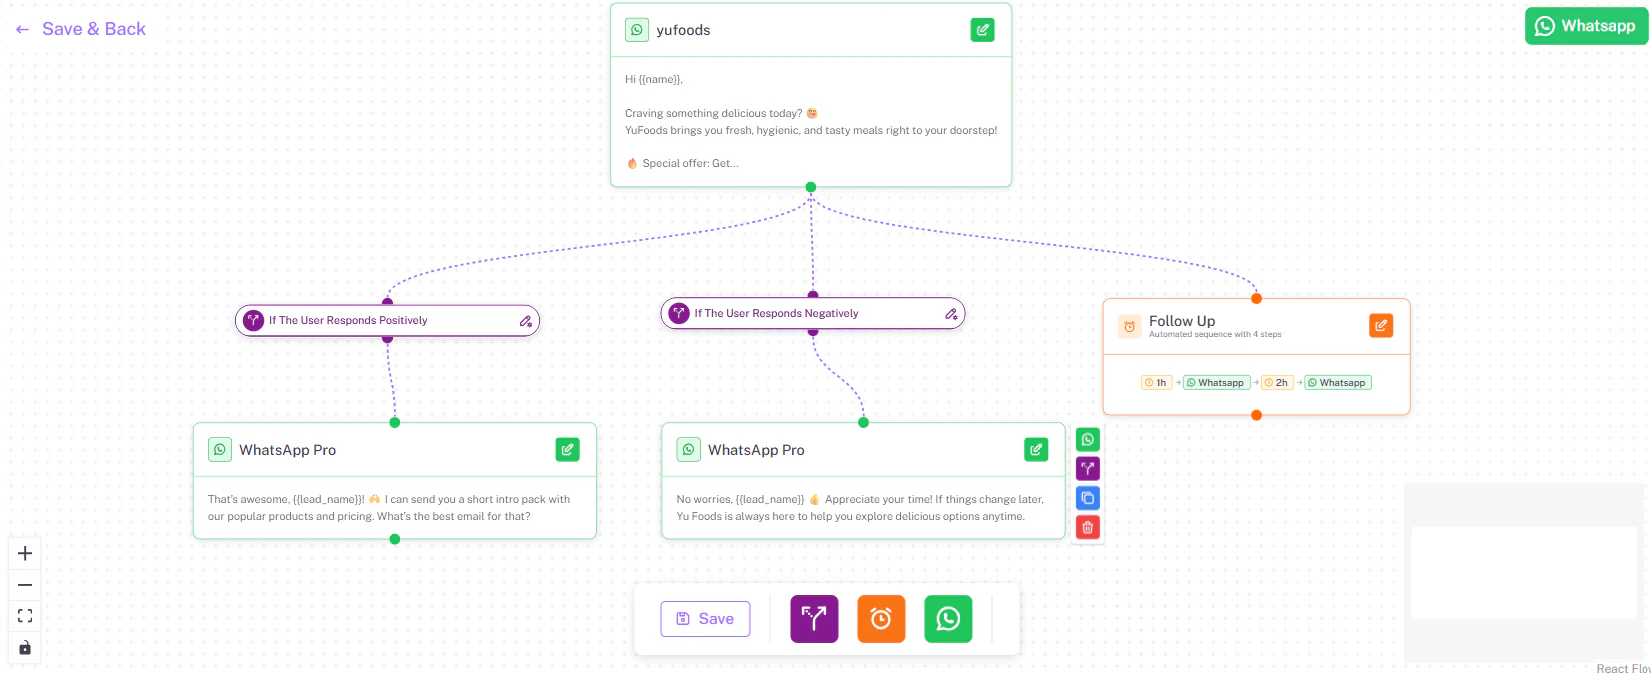
- Use Dynamic Variables by typing
@to inject personalized data like@firstNameor@company. - Define the AI Prompt that the bot should use to generate the WhatsApp message.
- Define the Intents at the bottom of this sidebar to categorize lead replies. This logic works exactly the same way as the Intent Branches detailed in our Building Email Workflows guide.
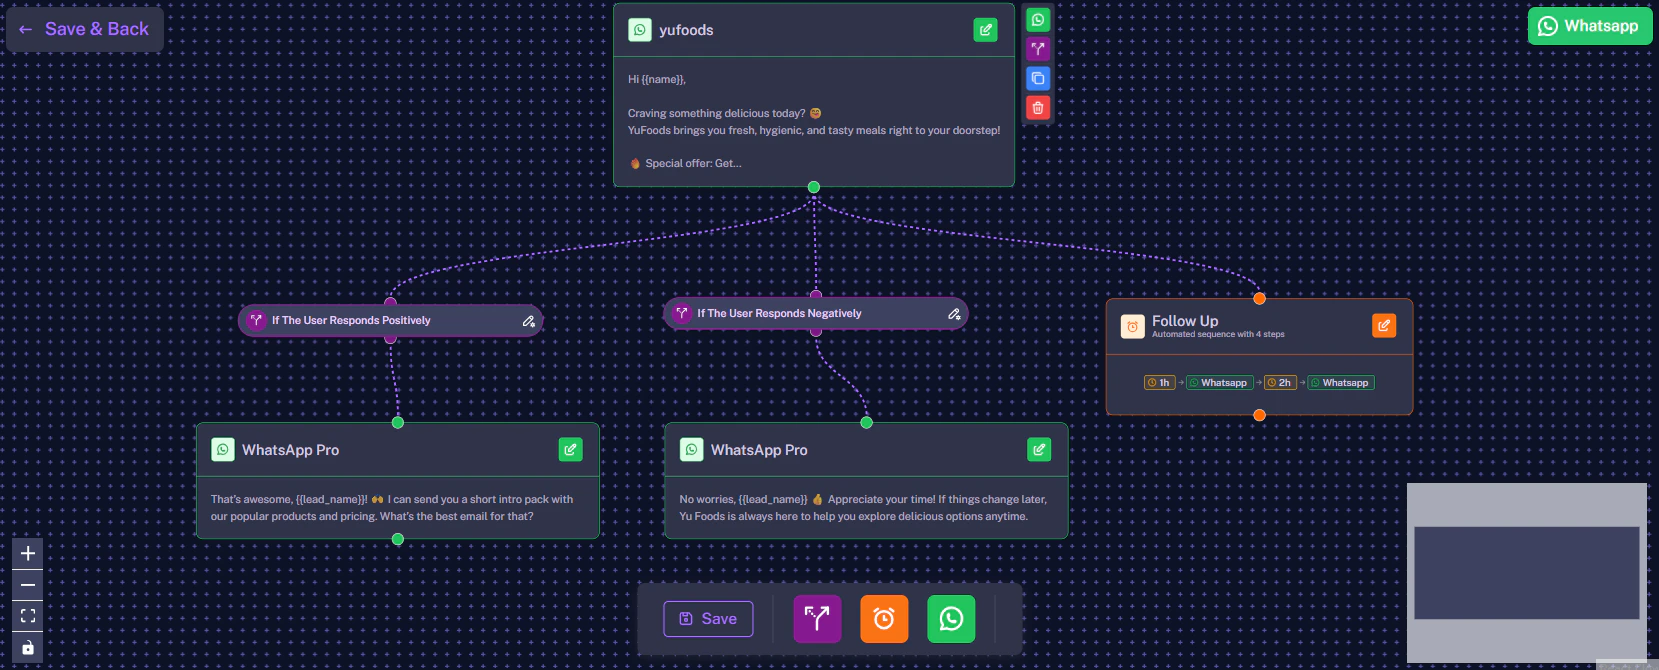
3. Response Paths (Positive/Negative)
Once the AI detects a reply, it uses your defined Intents to route the conversation down the appropriate path on the canvas (such as a ‘Positive Reply’ node or a ‘Negative Reply’ node). You can customize these subsequent nodes by clicking their pencil icons to tailor the follow-up message perfectly, either locking in the sale or gracefully exiting the conversation, using the identical logic we detailed in the Building Email Workflows guide.4. Setting Up Delays and Drip Follow-ups
If a target lead does not respond, the workflow can route them into a simple drip campaign sequence. For example, as shown in the canvas above, you can set the workflow to send the first WhatsApp, Wait 4 hours, and then send a subsequent follow-up WhatsApp message. If they still don’t respond, it can Wait 1 Day before sending another. The timing and number of follow-ups are completely customizable, adhering to the same logic and delays established in our email documentation.5. Saving Your Workflow
After you have configured your initial messages, adjusted your intent branches, and customized your follow-up delays, it is time to save your progress.- Save Individual Nodes: Make sure you save any specific node you are currently editing. Click the Save WhatsApp button at the bottom of the sidebar for message nodes, or the Save button for follow-up delay nodes.
- Save Progress (Stay on Page): While building your flow, you can periodically click the Save button located at the bottom middle of the canvas. This secures your entire workflow progress without leaving the builder.
- Save & Exit: Once your entire workflow looks perfect, navigate to the top right of the screen and click Save & Back.