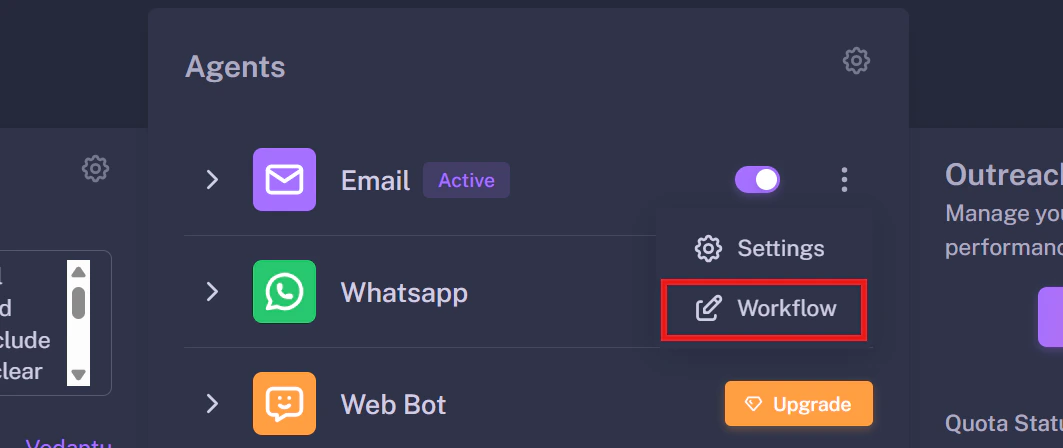
1. Accessing the Workflow Builder
To start building, navigate to your campaign and find the My Automation Flow card. Click the Edit Icon on the workflow button.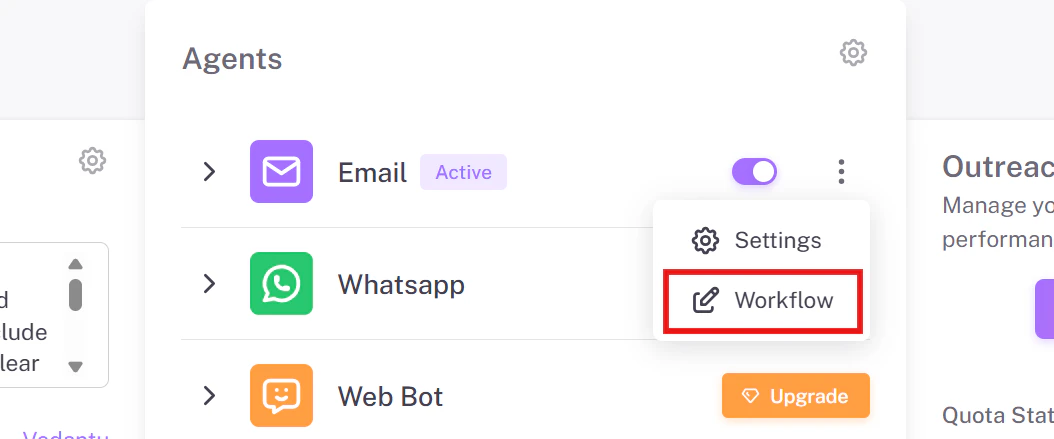
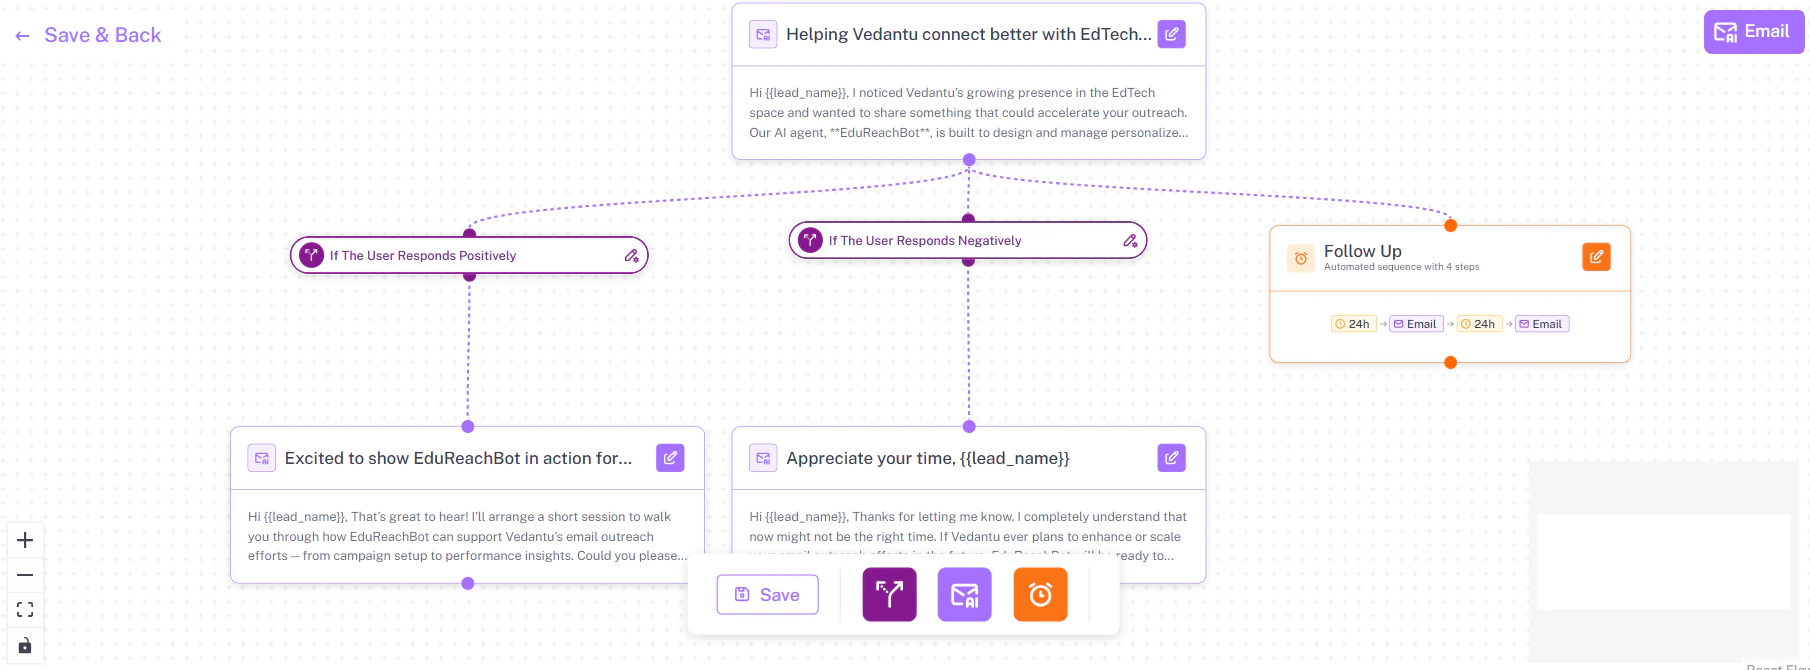
2. Configuring the Initial Email
To customize the first email your leads receive, click the Edit Icon on the very first Email node. A “Configure Email” sidebar will slide open from the right side of your screen.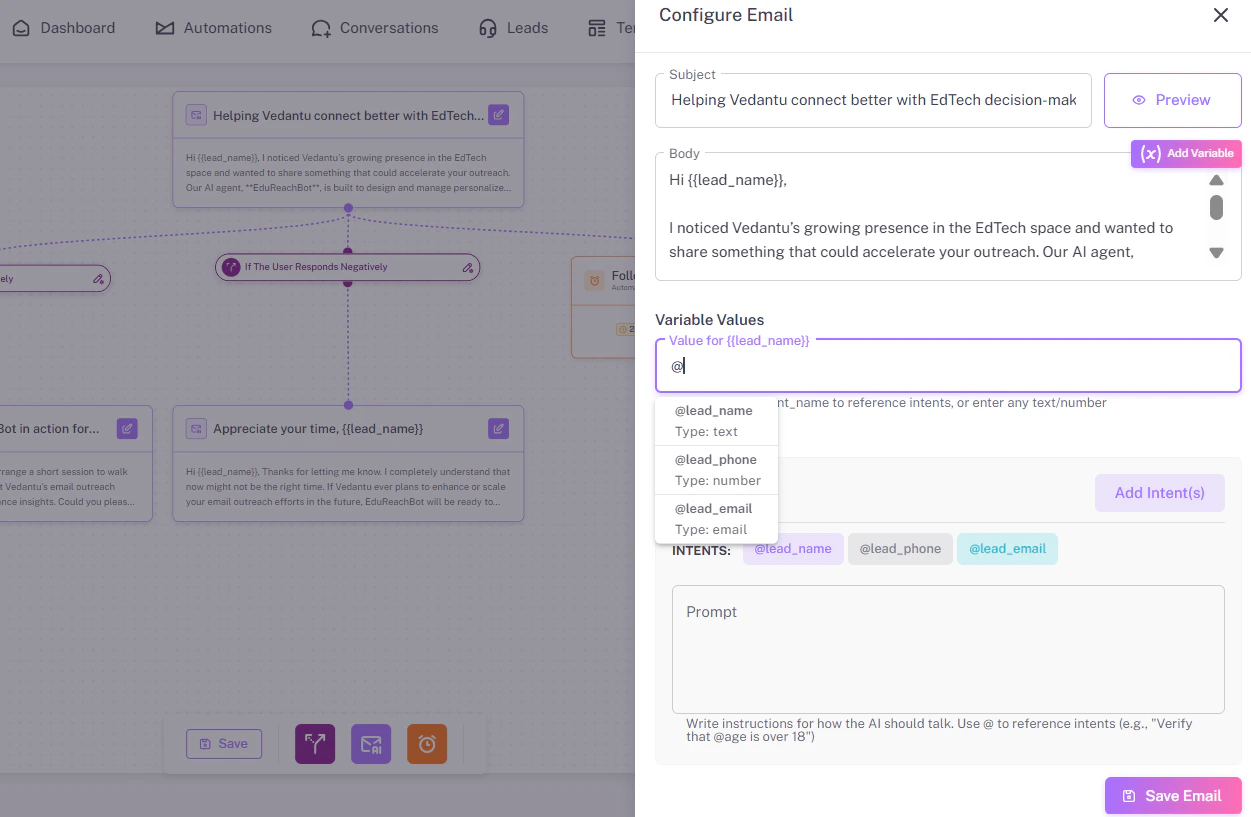
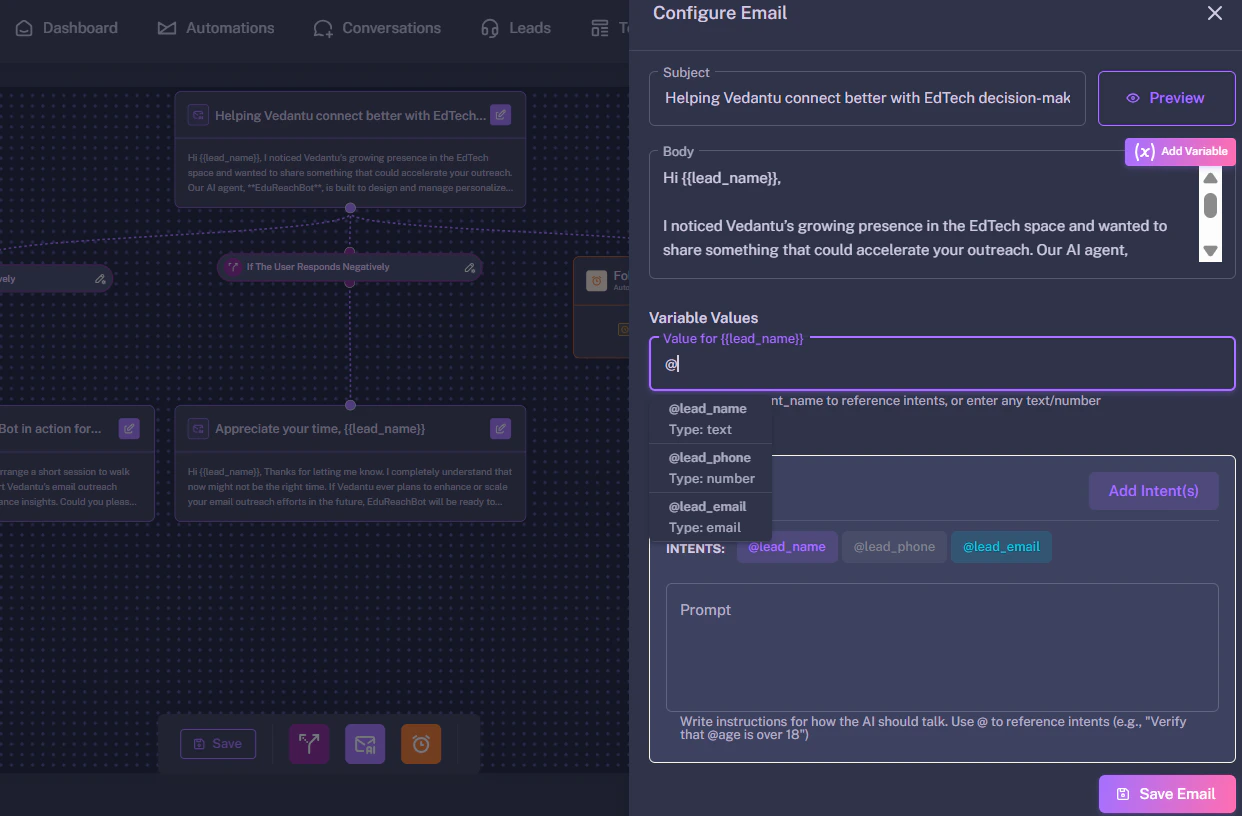
- Click the Add Variable button or simply type
@inside the prompt box. - A dropdown will appear allowing you to select data points like
@firstNameor@companyto ensure every email is highly personalized. - Click Save email when you are done modifying your prompt.
3. Managing Responses (Intent Branches)
At the bottom of the configuration sidebar, you will find the Intent section. This is where you define exactly how the AI should categorize and route incoming replies. The workflow automatically branches based on the lead’s response:- If the user responds positively, they are routed down one path (e.g., to book a meeting).
- If the user responds negatively, they are routed down another path (e.g., to politely close the loop).
- Note: You can also create custom intents based on your own specific campaign conditions.
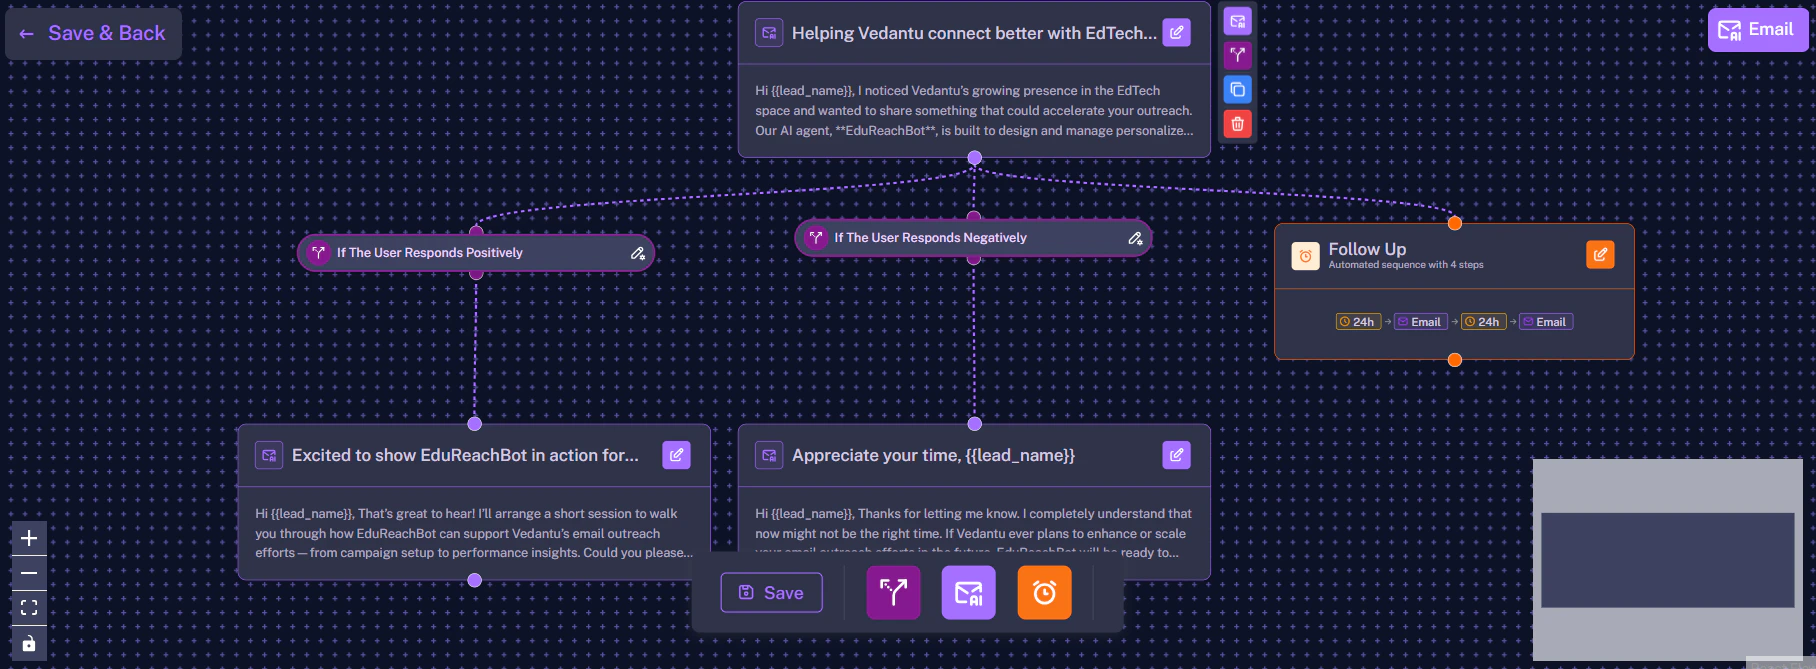
4. Automated Follow-Up Sequences
If a target lead does not reply to your initial email, the workflow routes them down the Follow-up path automatically. Click the Edit icon on a Follow-up node to configure it.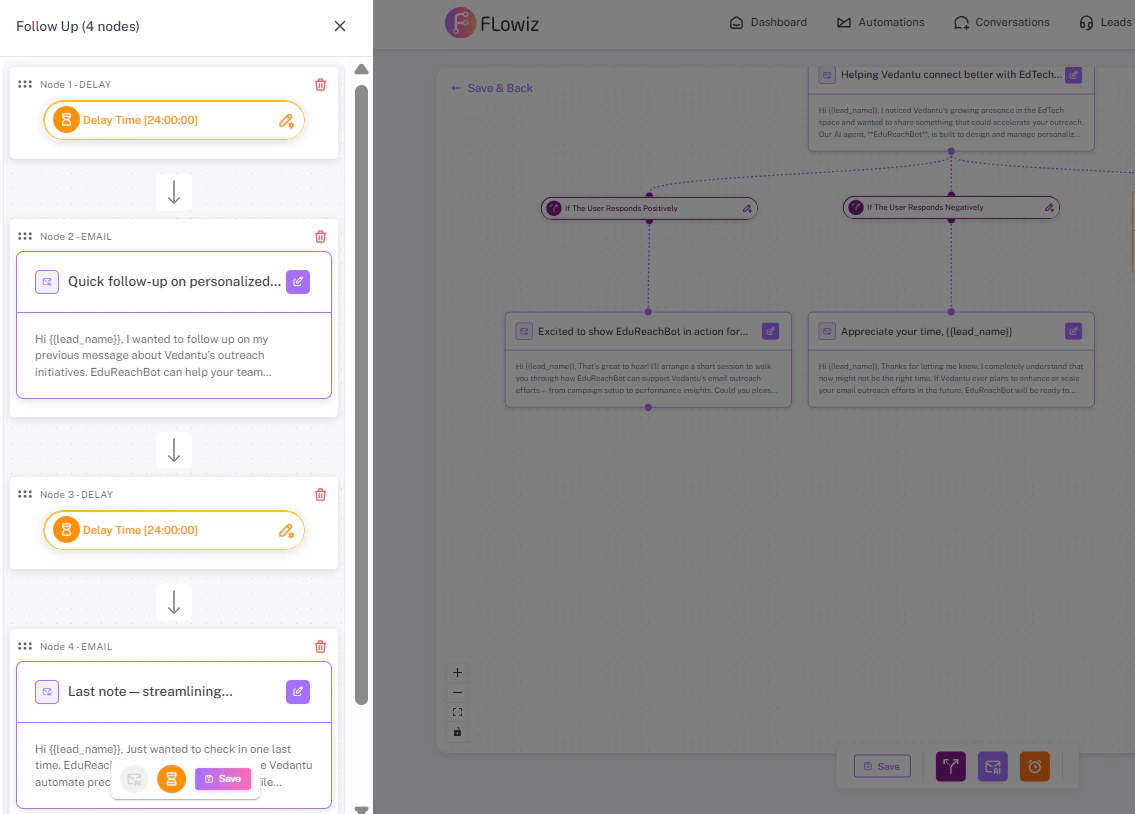
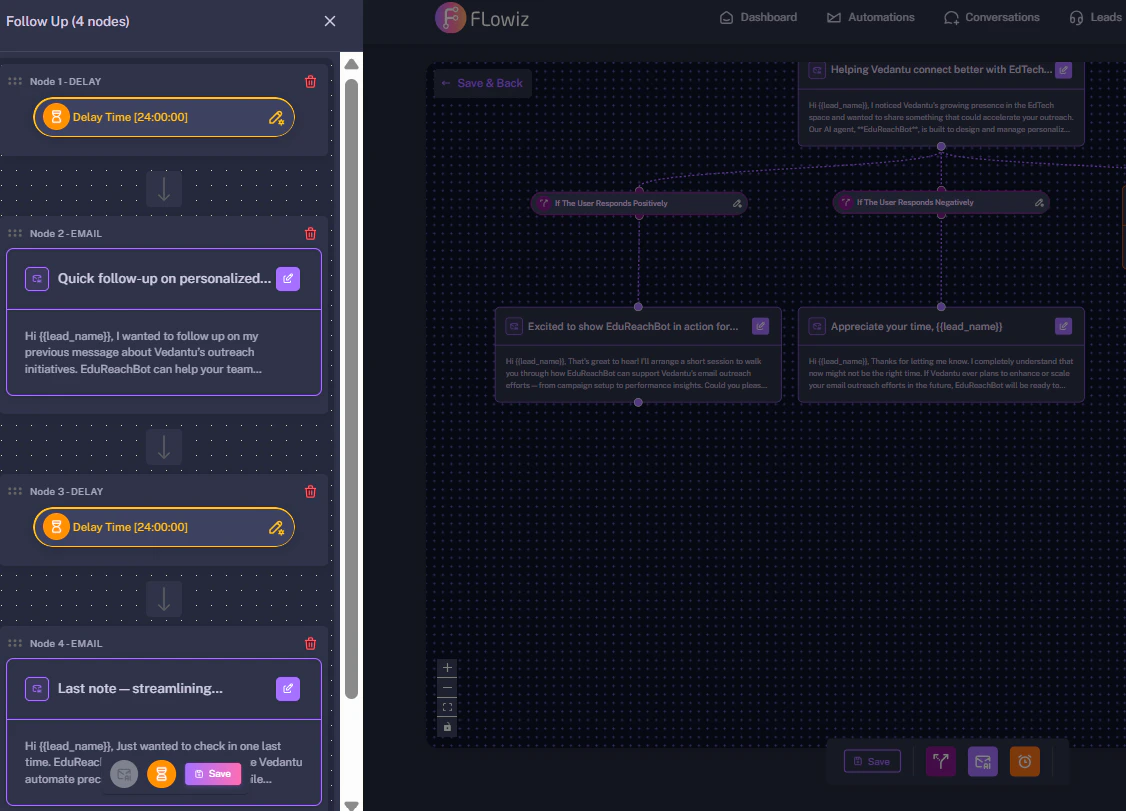
@location) to make the follow-up feel natural and highly relevant.
5. Saving Your Workflow
After you have configured your initial emails, adjusted your intent branches, and customized your follow-up delays, it is time to save your progress.- Save Individual Nodes: First, make sure you save any specific node you are editing. Click the Save email button at the bottom of the sidebar for email nodes, or the Save button for follow-up nodes.
- Save Progress (Stay on Page): While building your flow, you can periodically click the Save button located at the bottom middle of the canvas. This secures your entire workflow progress without leaving the builder.
- Save & Exit: Once your entire workflow looks perfect, navigate to the top right of the screen and click Save & Back.