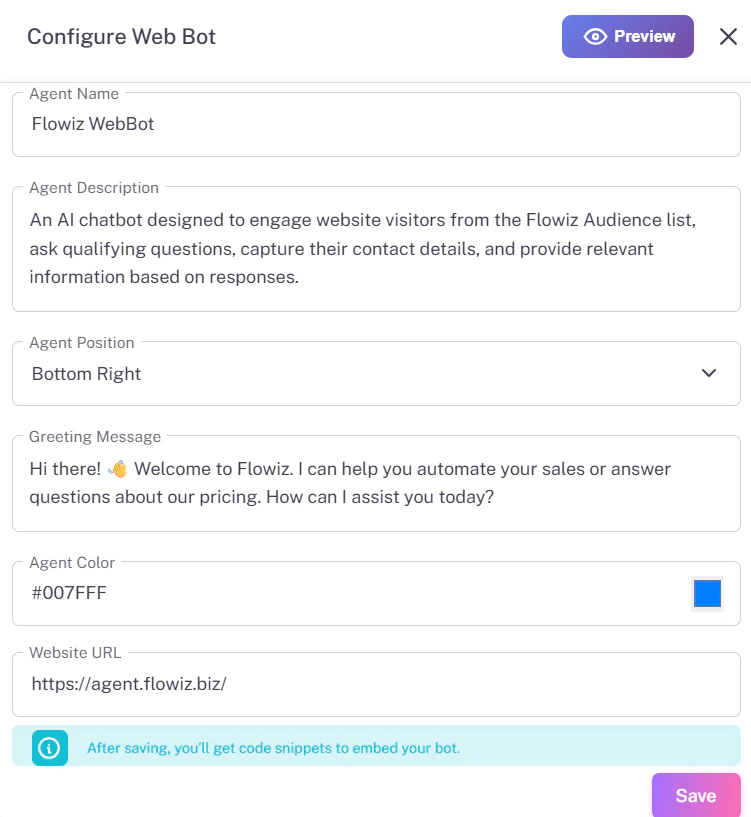
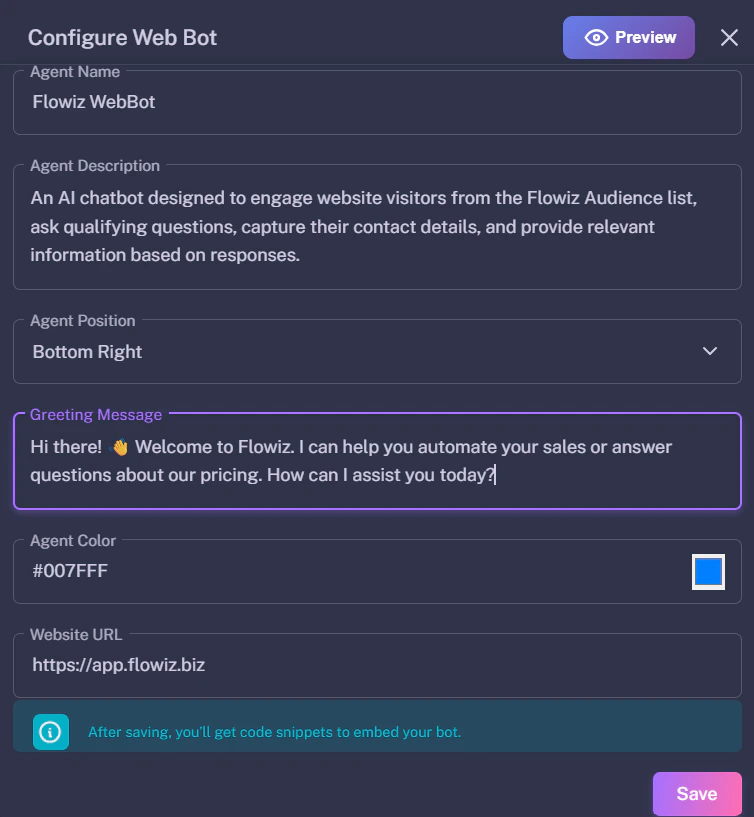
1. Configuration
Before you can install the bot, you must customize its appearance and behavior. Step 1: Click the Settings (Gear) icon next to WebBot. Step 2: Fill in the Configuration Form:- Agent Name: The name visitors will see (e.g., “Support Assistant”).
- Agent Position: Choose where the chat bubble sits (Bottom Right is standard).
- Greeting Message: The first thing the bot says (e.g., “Hi! How can I help?”).
- Agent Color: Match this to your brand’s color code.
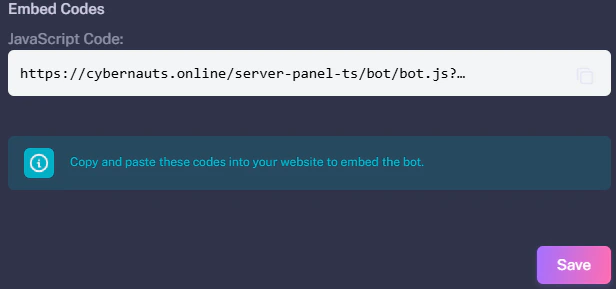
2. Generating the Script
The installation code is hidden until you save your settings. Step 1: Click the purple Save button at the bottom right. Step 2: Scroll down to the newly visible Embed Codes section. Step 3: Copy the JavaScript Code from the gray box.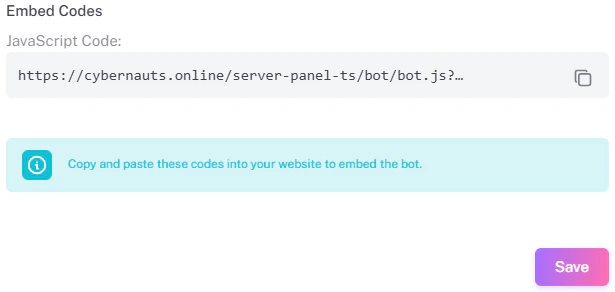
3. Installation
To make the bot appear on your site, paste the code into your website’s HTML source. Where to Paste: Paste the code inside the<head> or <body> tags of your website.
- WordPress: Use a plugin like “Insert Headers and Footers”.
- Custom Site: Paste it into your
index.htmlfile.