> ## Documentation Index
> Fetch the complete documentation index at: https://cybernauts.mintlify.site/llms.txt
> Use this file to discover all available pages before exploring further.
# Custom Nodes & Branching
> Take full control of your canvas by adding, connecting, and modifying custom workflow branches.
While Flowiz provides powerful out-of-the-box workflow templates, you are not limited to them. You can build entirely custom automation paths—or heavily modify existing ones—using the visual canvas tools.
*(Note: The mechanics of adding and connecting nodes work identically across Email, WhatsApp, and Web Bot campaigns).*
## 1. The Workflow Toolbar
At the bottom center of your canvas, right next to the **Save** button, you will find the **Node Toolbar**. This is your primary toolkit for dragging new elements into your workflow.

 From left to right, these icons allow you to add:
1. **Decision Node (Split Path):** Creates a fork in the road, allowing you to branch the workflow based on user intents or conditions.
2. **Agent Node:** Adds a new core action node (e.g., sending an Email, a WhatsApp message, or a Web Bot reply).
3. **Follow Up Node:** Injects an automated delay sequence into your path.
## 2. Adding and Connecting Nodes
To build a custom branch, simply click an icon from the toolbar to drop it onto your canvas.
For example, if you add a **Decision Node**, you must connect it to a subsequent action. To do this, click the small colored dot on the Decision Node, drag the connection line, and attach it to the dot on your target Agent Node.
From left to right, these icons allow you to add:
1. **Decision Node (Split Path):** Creates a fork in the road, allowing you to branch the workflow based on user intents or conditions.
2. **Agent Node:** Adds a new core action node (e.g., sending an Email, a WhatsApp message, or a Web Bot reply).
3. **Follow Up Node:** Injects an automated delay sequence into your path.
## 2. Adding and Connecting Nodes
To build a custom branch, simply click an icon from the toolbar to drop it onto your canvas.
For example, if you add a **Decision Node**, you must connect it to a subsequent action. To do this, click the small colored dot on the Decision Node, drag the connection line, and attach it to the dot on your target Agent Node.
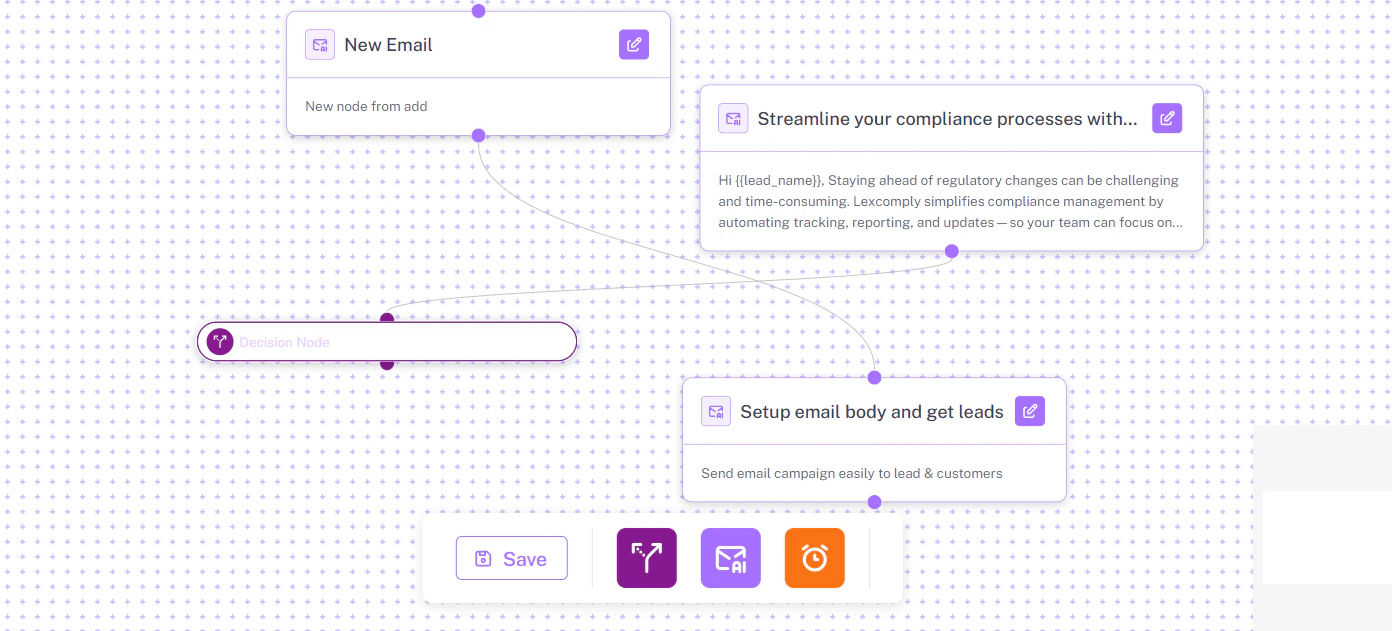
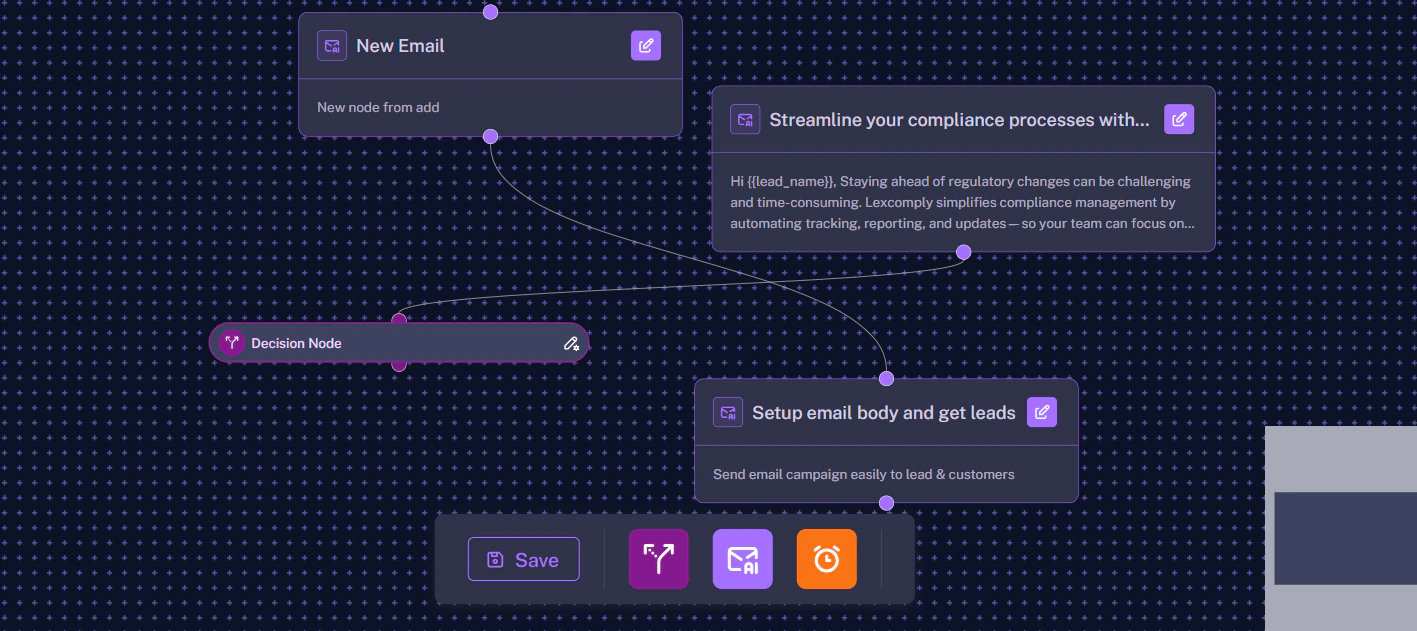 By chaining Decision Nodes to Agent Nodes, you can build highly complex, multi-layered conversation trees tailored perfectly to your audience.
## 3. Node Hover Actions (Edit, Clone, Delete)
Once a node is on your canvas, you can quickly modify it using the **Hover Menu**. Simply place your mouse cursor over any node (like an Agent or Follow Up node) to reveal the action stack on its right side.
By chaining Decision Nodes to Agent Nodes, you can build highly complex, multi-layered conversation trees tailored perfectly to your audience.
## 3. Node Hover Actions (Edit, Clone, Delete)
Once a node is on your canvas, you can quickly modify it using the **Hover Menu**. Simply place your mouse cursor over any node (like an Agent or Follow Up node) to reveal the action stack on its right side.
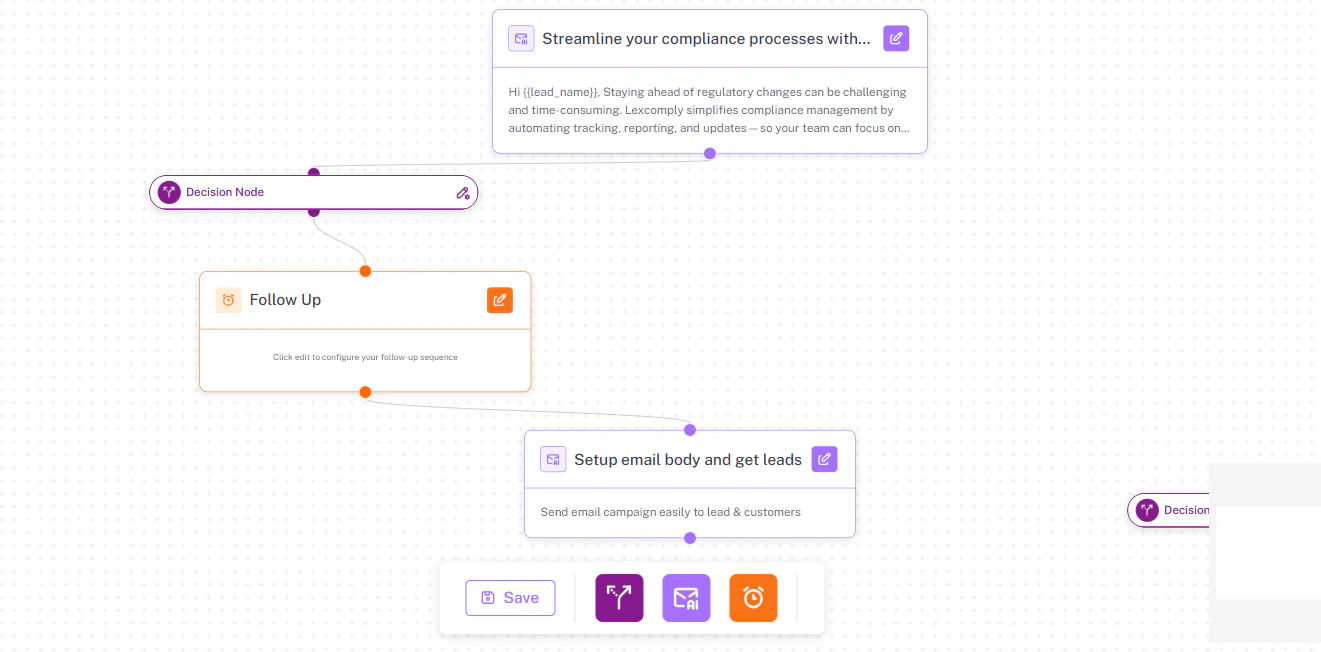
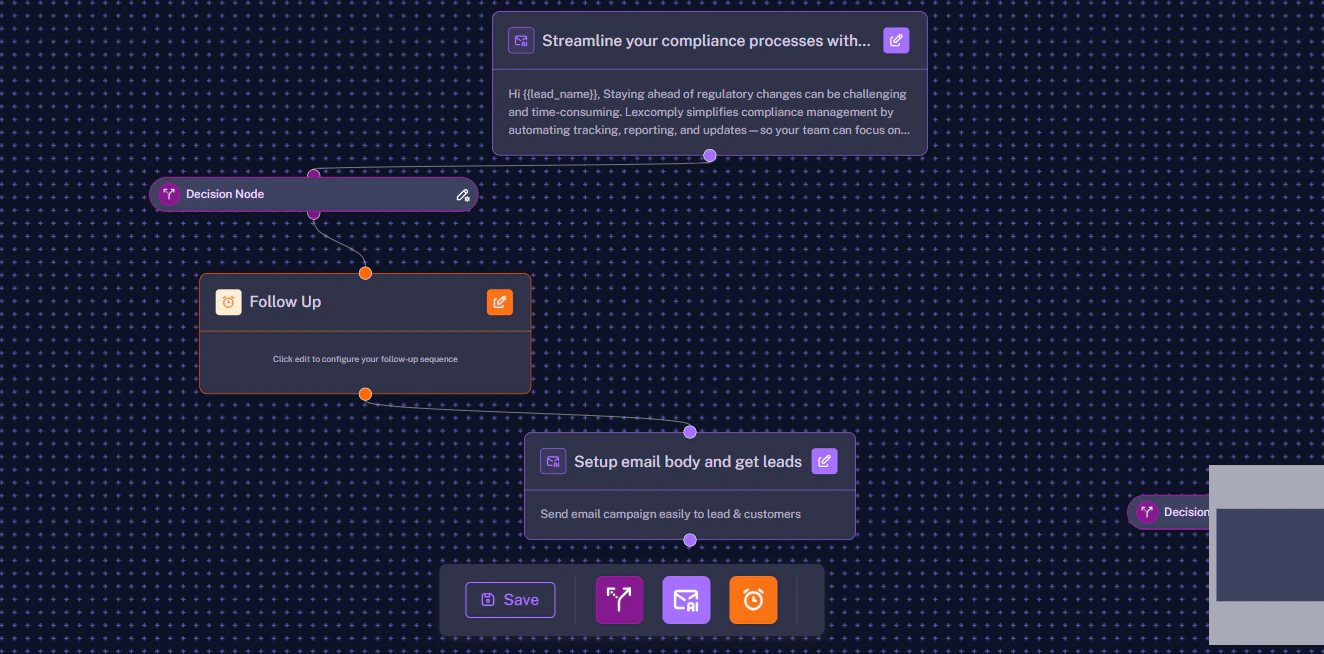 The hover menu provides rapid shortcuts to build out your flow:
* **Edit Icon (Inside Node):** Opens the configuration sidebar to edit the node's settings, variables, and AI prompts.
* **Add Agent Icon:** Instantly creates and attaches a new action node (Email, WhatsApp, or Web Bot) directly below the current one.
* **Add Branch Icon:** Instantly creates a new Decision branch starting from this exact point.
* **Copy / Clone Icon:** Duplicates the current node and its settings, saving you time if you want to reuse a similar prompt or delay.
* **Trash Can Icon:** Deletes the node and severs its connections. *(Be careful: deleting a parent node may affect the nodes connected below it).*
**Pro Tip:** Remember to frequently use the **Save** button on the bottom toolbar while you are dragging and connecting nodes to ensure your custom layout is secured!
The hover menu provides rapid shortcuts to build out your flow:
* **Edit Icon (Inside Node):** Opens the configuration sidebar to edit the node's settings, variables, and AI prompts.
* **Add Agent Icon:** Instantly creates and attaches a new action node (Email, WhatsApp, or Web Bot) directly below the current one.
* **Add Branch Icon:** Instantly creates a new Decision branch starting from this exact point.
* **Copy / Clone Icon:** Duplicates the current node and its settings, saving you time if you want to reuse a similar prompt or delay.
* **Trash Can Icon:** Deletes the node and severs its connections. *(Be careful: deleting a parent node may affect the nodes connected below it).*
**Pro Tip:** Remember to frequently use the **Save** button on the bottom toolbar while you are dragging and connecting nodes to ensure your custom layout is secured!